Much like payments, refunds should be entered within the Compass application. When they are entered, Compass syncs this information with QuickBooks online as a "check." The refund is accounted for in the Accounts Receivable account. This causes the system to balance, because the refund also decreases the balance due on the customer's original invoice. When a refund is entered, the QuickBooks Online user should be notified to ensure it is accounted for correctly.
The below instructions detail how to record and verify a refund within Compass and QuickBooks Online.
If you have any questions about this process, or issues dealing with refunds, you can reach out to accounting@miraclemethod.com.

The below instructions detail how to record and verify a refund within Compass and QuickBooks Online.
If you have any questions about this process, or issues dealing with refunds, you can reach out to accounting@miraclemethod.com.
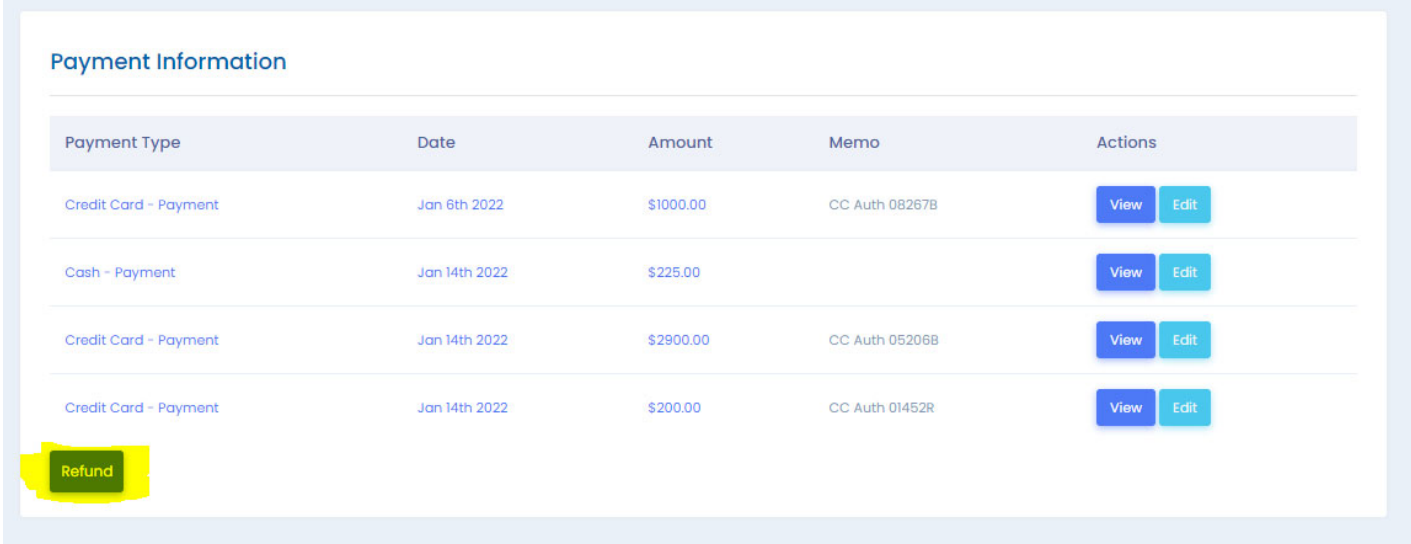
1) Navigate to the customer's sale page that the refund will be associated with. Scroll down to the payment information and click "Refund."
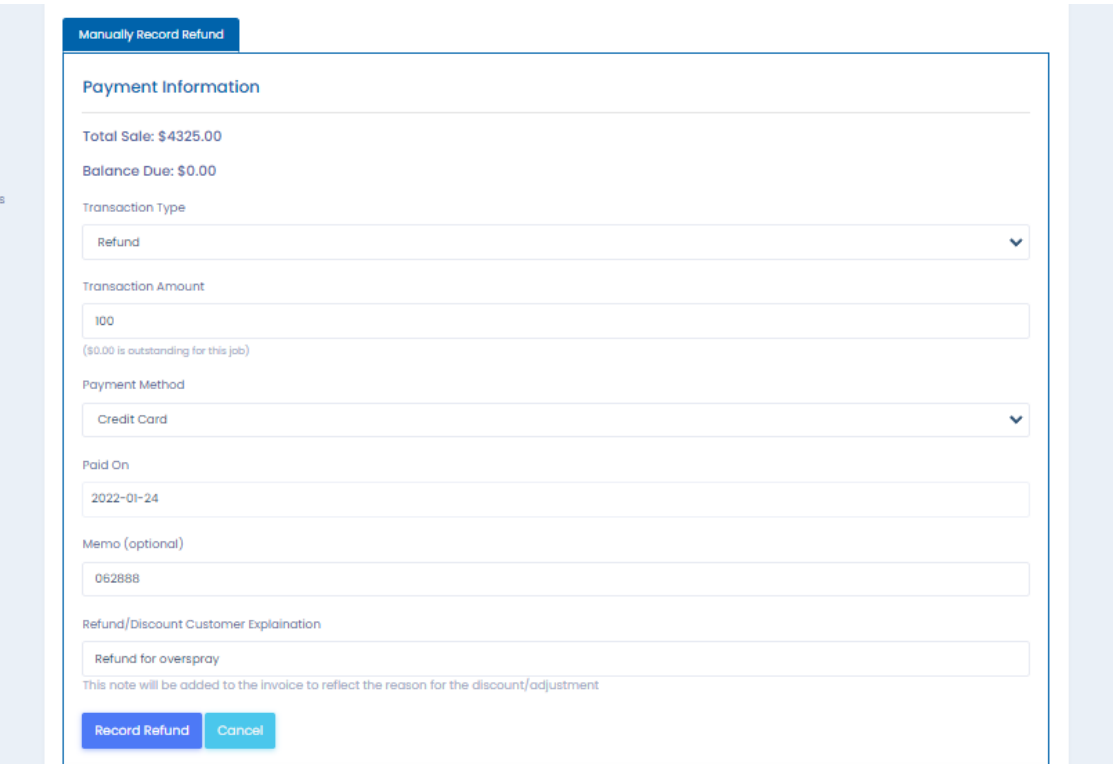
2) Next enter the details of the refund. Ensure the transaction type is “refund.” Enter the refund amount, no need to
manually enter a negative value. Payment method should match the type of refund: credit card, check, cash, etc.
The memo field should be used in a consistent manner, keeping in mind it will populate in the memo of the refund
check in QBO. In the below example, the CC refund authorization code was used. Finally, the refund reason should
be concise and specific, as it will be the description of the negative line item on the updated invoice. Once the
refund details are confirmed as accurate, click "Record Refund"
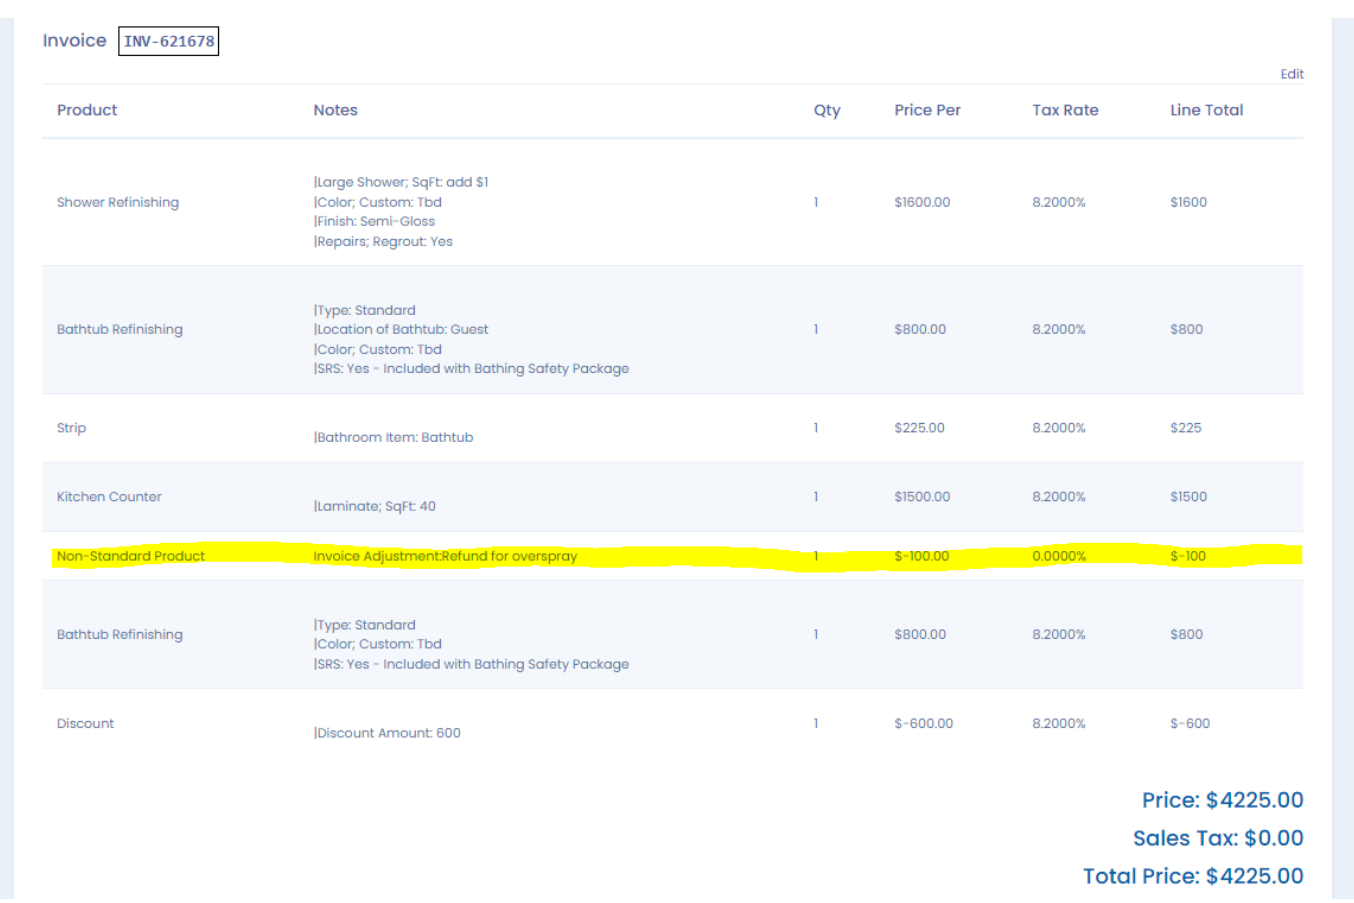
3) Back on the sale page, the refund will auto generate as a negative line item, reducing the invoice total to reflect a
balance of $0 due to the customer. The adjustment on the invoice and the refund will sync to QBO, where the
refund process is finished.
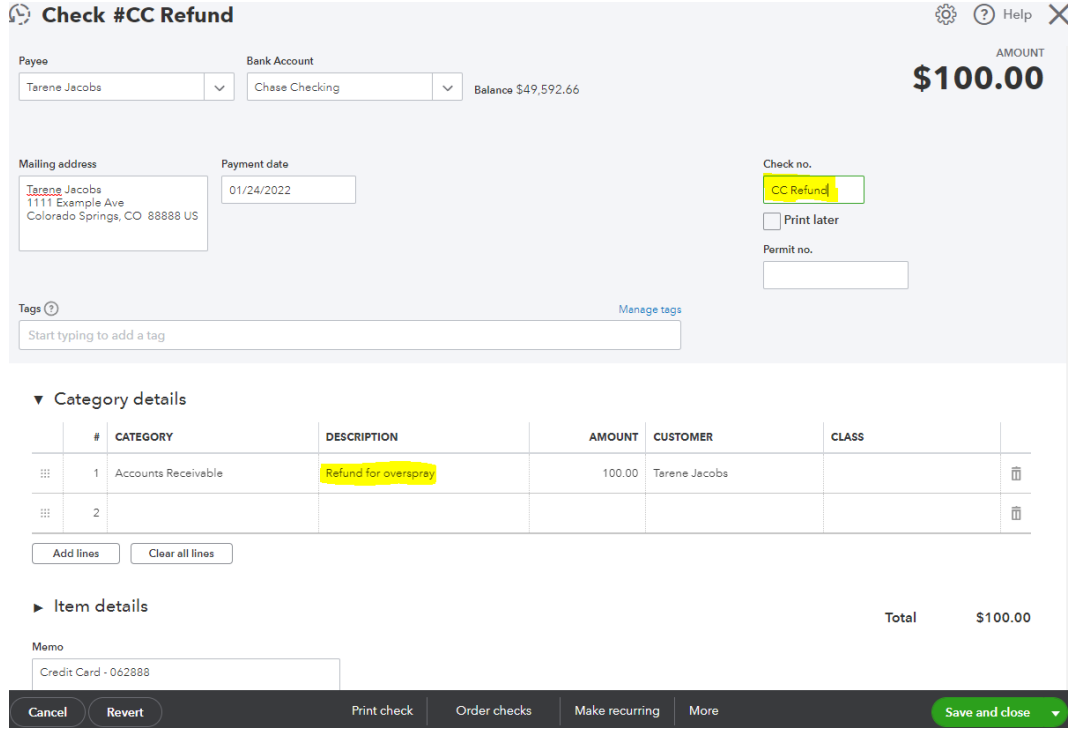
4) Now move over to QuickBooks Online. The refund syncs over as a “check”, which can be found on the customer page. The bookkeeper should
open the check to edit the Check no. field and Description field if needed. Verify all other auto populated fields
are correct. If the refund check needs to be printed, check the Print later box. If the refund is processed using a
different method, the Check no. field should indicate how the refund was made: CC refund, EFT refund, etc. The
manually entered fields are highlighted below. Click Save and close when finished
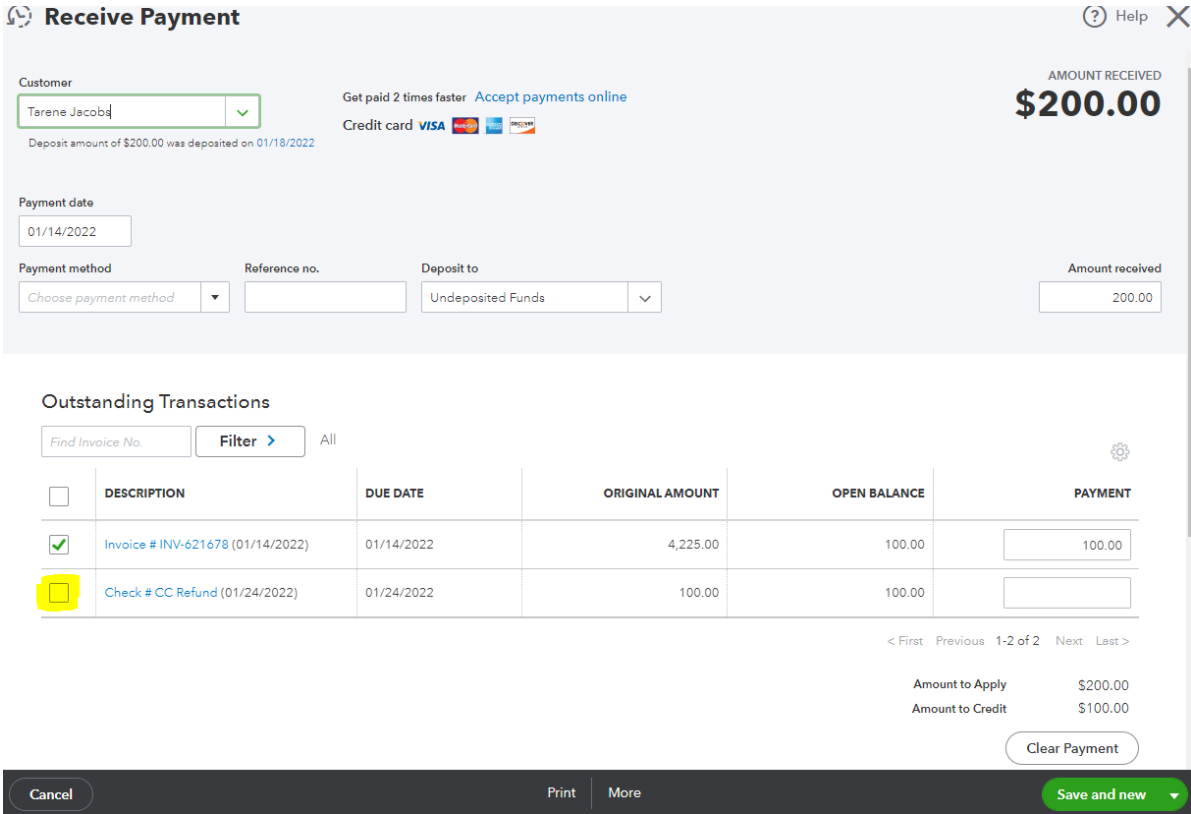
5) The adjusted invoice will leave an overpayment on the customer’s account. The final step is to apply the
overpayment to the refund check to zero out the customer’s balance. Click into the payment with the “partial”
status.
6) Apply the overpayment to the refund check by checking the highlighted box. Click Save and close.
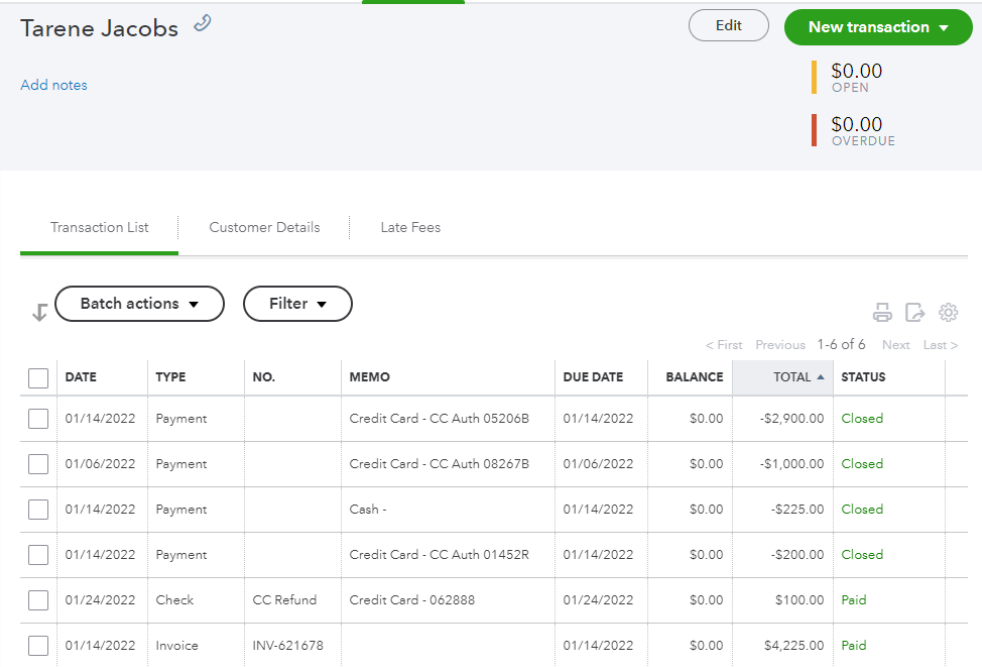
7) After saving, verify the “open” and “overdue” balances are $0 (If the customer has no other open invoices) and
confirm all payments and invoices associated with the refund have “closed” or “paid” in the Status column.
Was this article helpful?
That’s Great!
Thank you for your feedback
Sorry! We couldn't be helpful
Thank you for your feedback
Feedback sent
We appreciate your effort and will try to fix the article